Yesterday I took part in the
ILSSA (Impractical Labor in Service of the Speculative Arts) First Annual Festival to Plead for Skills, only in this case,
ILSSA members practiced skills instead of pleading for them. I decided to practice making paper.
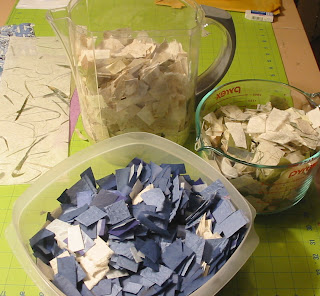
I rooted around in my big bag of handmade paper scraps, leftovers from various projects, then sorted and cut them into small pieces:

Then I descended into the scary basement and set up my papermaking operation. I soaked the paper bits in water overnight, and here I am making a sort of paper daiquiri:

The paper cooperated better than I expected. I used pieces of abaca, mulberry and cotton papers, and they blended up nicely. There was water EVERYWHERE, but I managed to make quite a lot of pulp in the food processor without any electrocutions, smoke or random explosions, although some disturbing-looking brown stuff did leak out the bottom of the f.p. Fortunately, it wasn't anywhere near the paper.
Here is some paper pulp, ready to be transformed into some lovely paper sheets (I hope).

And finally, some finished sheets, rollered onto boards, a wooden box, and a glass window that was left over from when we replaced some window in our elderly house. The paper is still drying as I write this, so it will be interesting to see how it looks when dry. I really like how the colours turned out. I started with brown pulp, then as the pulp thinned (after I pulled several sheets of paper) added the green to the vat, then gradually added the blue pulp. I ended up with sheets of brown, greenish-brown, bluish-green, and finally dark blue papers.

As I was sloshing away in my vat, it was good to think of all the other ILSSA members, sawing, punching, gnawing (who knows?), and just generally practicing their own crafts at the same time.


 After a fine breakfast, prepared by Jim's wife, Melodie, it's off to the open-air workshop to spend the first of nine days making books (well, in my case, making book, as I'm incredibly slow and only got one finished). Here is a front view of the workshop (the left side of the building--Jim and Melodie live on the right side):


 The paper cooperated better than I expected. I used pieces of abaca, mulberry and cotton papers, and they blended up nicely. There was water EVERYWHERE, but I managed to make quite a lot of pulp in the food processor without any electrocutions, smoke or random explosions, although some disturbing-looking brown stuff did leak out the bottom of the f.p. Fortunately, it wasn't anywhere near the paper.


